Showing posts with label kid friendly. Show all posts

Saturday, August 17, 2013

Pancake Squares


So sorry I have been MIA. I started back to school this week.  Life has been a bit hectic.

Anyway, I try to make a breakfast of some sort about two times a week just to break up the cereal/granola bar/oatmeal routine.  I had pinned this recipe once upon a time on Pinterest and decided to give it a try last weekend. 

What is it?

Basically, pancakes in a casserole dish form.

I love pancakes and make them fairly often (usually homemade).  But usually when I make them, it is for dinner.  Mainly because who has time to make them for breakfast? I don't have a lot of time in the mornings to stand in front of the griddle, flipping pancakes. 

If my kids get pancakes for breakfast, it is only because we had some extras and we froze them.

Until now.

Now that I know about this, we will have them more often.

No, they don't look like pancakes. They aren't circles.

But they taste pretty close. AND they are quick and easy.

Perfect for mornings!

Ingredients:
3/4 cup milk

2 Tbsp melted butter, slightly cooled

1 large egg

1 Tbsp sugar (granulated)

1 cup flour

2 tsp baking powder

1/4 tsp salt

Directions:
Pre-heat oven to 350.

Slightly grease or spray an 8 x 8 baking dish.

In a mixing bowl, pour the milk, butter, and egg.  Beat together.  Add the sugar.  Next, add in the flour, a little at a time.

Stir in the baking powder and salt.

Pour batter into the greased baking dish. Bake for about 25 minutes.

Enjoy!

I topped it with melted butter, and we used syrup if we chose to the top of it.

It was good stuff.  Easy and good.

Reba

Saturday, July 27, 2013

Peanut Butter Chocolate Chip Oatmeal Bars

 On occasion, I make "breakfast energy bites" which usually Child 4 and I eat ourselves.  But this week I saw this recipe (very similar but cooked and in "bar" form and gave it a try. 

Well, all I can say is that they were gone really fast.  And it was NOT just because of Child 4 and me.  The whole family (minus Dad who was gone) chowed down on them. I WILL be making them again, especially during the school year. They are quick, fairly healthy, and can be made ahead of time then just reheated (if preferred). 

Ingredients:
1/2 cup brown sugar
1 cup peanut butter (I used creamy/natural)
2 tsp vanilla
1 cup flour (the original recipe used whole wheat, I just had all purpose on hand)
1 cup old fashioned oats (I am not sure how it would work with quick oats)
1 tsp baking soda
1/4 tsp salt
1/2 cup milk
1/2 cup chocolate chips
1/2 cup other add in (original recipe used raisins, I used flax meal)

Directions:
Preheat oven to 350 degrees.

Spray an 8 x 8 baking dish with cooking spray.

With a mixer, mix the peanut butter and brown sugar on medium speed until fluffy, about 3 minutes. The original recipe called for using the paddle attachment.  My mixer does not have that so I just used the regular beaters and they worked fine.

Mix in the vanilla.

Continue mixing on medium speed, adding in the flour, oats, baking soda, and salt.  It will be thick. Just be patient. :)

Slowly pour in the milk.  Mix until a dough forms.

Fold in the chocolate chips and the other add in.

Once all is combined, press into the baking dish. 

Bake for about 17-20 minutes until gold brown. 

Allow to cool completely before cutting. 

I stored them in the fridge, but I am guessing they would be fine on the counter.

Enjoy!


Tuesday, July 23, 2013

Smores Bars

I am not a big marshmallow fan.  I can do without Rice Krispie treats.  And Rocky Road ice cream is NOT my favorite.

But Smores.

Oh, how I love smores.

In fact, I have a whole Pinterest board dedicated to them.  "More Smores". 

The unfortunate thing is my hubby is not the smores fan I am.

So I don't try out the smores recipes nearly as much as I want.  Well, due to that and the fact that I would weigh a LOT more if I did.

But every now and then I figure out a way to do it.

Like when we are going to a cookout.

Perfect time.

So this past week, I decided to try Smores Bars.

They looked easy.  Required little preparation.  And they could be made ahead of time.

The only "warning" I feel like I should give is to let people know ahead of time that they are cold.

My kids all complained a little at first because they think "smores" and think "warm".

Yet it didn't stop one of them from eating the bars.

Ingredients:
3 Tbsp unsalted butter, melted (plus a little more for greasing purposes)

1 cup graham cracker crumbs (I just threw a "sleeve" of crackers into the food processor and whirled away), plus 2 graham crackers broken into large pieces

3/4 cup sweetened condensed milk (not quite a whole can)

1 1/3 cups semi-sweet chocolate chips

1 1/2 tsp vanilla

pinch of salt

1 cup mini marshmallows

Directions:
Line an 8 x 8 baking pan with aluminum foil and butter/grease.  I did do this but I actually think next time I would just grease the baking pan itself with the butter or cooking spray.

Mix the melted butter and the graham cracker crumbs together in a bowl with a fork until moistened. 

Press firmly into the bottom of the baking dish.

This is the only area I had trouble. I pressed as much as I could but my crumbs just never stuck together. I don't know if I should have used more butter, pressed more, or what.  Don't get me wrong, it was still tasty.  I just couldn't get it to gel.  I think next time I make these, I will do something similar to what I do with the pretzels for pineapple fluff.  I think I will "bake it" at 400 degrees for 5-7 minutes...just enough to make it a bit crunchier/more together.  I will let you know how that goes. :)

Next, heat the chocolate chips and the condensed milk over medium heat, stirring constantly until smooth.  Once smooth, remove from the heat and add in the salt and vanilla.

Quickly, pour over the graham cracker and spread. You have to work quick or it will start to harden.  I found that if I held the spatula vertically and started in the middle to spread to the sides, it worked much easier. Otherwise the graham crackers try to go with the chocolate. :)

Next, pour the marshmallows over the top and push down into the chocolate.

Finish by pressing in the broken pieces of the 2 graham crackers in the "holes" left by marshmallows.

Cover and refrigerate for 4 hours or so before cutting/serving.

Enjoy!

Thursday, July 18, 2013

Cinnamon Sugar "Donut" Muffins


I try to make breakfast a couple times a week.  I have been eying this recipe on Pinterest for a while and decided to give it a try. 

It didn't take long to assemble them and then it was a short time to bake and then breakfast time.

And...

YUM.

They taste JUST like cinnamon sugar donuts.

In muffin form.

And baked.

(I calculated the calories and they were not horrible)

I made a double batch:  one mini muffin batch and one regular muffin batch.

Here is the recipe for one batch...

Ingredients:
1 3/4 cups all purpose flour
1 1/2 tsp baking powder
1/2 tsp salt
1/4 tsp nutmeg
3/4 tsp cinnamon
1/4 cup vegetable oil
2/3 cup granulated sugar
1 egg
1 cup milk

Directions:
Preheat the oven to 350 degrees.

Whisk together flour, baking powder, salt, nutmeg, and cinnamon.

In another bowl, stir/whisk together vegetable oil, sugar, egg, and milk.

Pour the flour mixture into the oil mixture and stir just until mixed.

Coat the "cups" of the muffin tin or use muffin liners. I used liners.

Divide the batter evenly among the cups.  (I did one 24 mini muffin tin and one 12 cup regular muffin with a double batch)  I used my cookie scoop to put the mixture into the cups.  It was almost even/level with the tin.

Bake for 15-18 minutes.  (I think mine was close to 20 minutes)

Remove the muffins from the muffin tin and cool on a wire rack.

Topping recipe:
1/4 cup melted butter
1/3 cup granulated sugar
1 Tbsp cinnamon

Directions:  
Put melted butter in one bowl.  Mix cinnamon/sugar in another bowl.

Now, in the original recipe. they dipped the whole muffin in the butter and then the cinnamon sugar mix.

I only dipped the top.  (In fact, I did NOT double the topping and had JUST enough for two batches) 

Either way, my kids have raved about them.  My son came in and said, "Thanks for the donuts, Mom!" 

Enjoy!

Reba


Monday, July 15, 2013

Hot Fudge Brownie Pie


I don't make dessert often though I have a BUNCH of them pinned on Pinterest.

It isn't that I don't like desserts.

It is actually the opposite.

I love them.

Too much.

So it is better if I don't make it often.

Because if I do, I eat them.  :)

However, once in a while, I splurge.

Like last night.

This is one I have pinned not once but twice. And possibly even three times.

It just looked oh so yummy.

So last night I got dinner in the oven then turned my attention to this recipe.

It is labeled as "hot fudge pie" but other than baking it in a pie dish, there is nothing really "pie" about it. 

We had great discussion about what it truly is.

And our answer?

A cross between a brownie and a molten chocolate lava cake.  

Except this was even easier the chocolate lava cake (which is pretty simple).

And what I love is that the portion size is that much easier to control.

With a hungry teenager in the house, I didn't have to worry about eating too much. :)

Ingredients:
4 oz unsalted butter
1 1/2 squares unsweetened chocolate (1.5 oz)
1 cup sugar (granulated)
2 eggs beaten
1 tsp vanilla extract
2 Tbsp milk
1/4 cup all purpose flour

Directions:
Pre-heat the oven to 350. 

Grease a pie pan (use butter or a cooking spray).

Melt butter and chocolate together.  I suppose you could do this stove top. I went the microwave route.  I put them together in a large measuring cup and headed for 30 seconds, stirred slightly, then heated 30 seconds more. The chocolate wasn't very melted at this point but the butter was. So I just took it out and stirred it for a few minutes.  Then it was a silky chocolate mess... :)

Let it cool while you stir the sugar into the beaten eggs.  Note: A hand mixer is not necessary. You just need a good spatula or spoon and a little elbow grease.  Stir until the sugar is fully incorporated into the eggs.

Once the chocolate mixture has cooled (and not before then or you will cook the eggs :), add it to the egg mixture.  Stir together.

Next add the vanilla  and milk.  Stir together.

Last, fold in the flour until no white is showing.

Do NOT overmix.

Pour the mixture into the pie pan and bake for 25 minutes.

Let it cool a few minutes.

I HIGHLY recommend eating this with ice cream on the side.

YUM.

Enjoy!

Reba

Sunday, April 21, 2013

Chocolate Caramel Graham Crackers


The other day, a co-worker at school was having a milestone birthday.  We were asked to bring snack foods.  If you know me at all, I don't typically just drop by the grocery store.  I try to go once a week.  That is it.

And this past week was particularly busy.  And exhausting.

What to do, what to do...

I remembered reading a recipe I found via Pinterest using graham crackers. I have lots of graham crackers. That sounded promising.  But when I looked at it, I was short an ingredient or two.

I considered making the brownie bites with peanut butter frosting.  But, alas, there was no cream cheese in the house (how did I let that happen?).

So I did a Google search and found just what I needed.

Chocolate caramel graham crackers.  

Quick, easy, and I had all of the ingredients needed.

I don't know that I totally agree with the title. It had more of a toffee taste to me than a caramel.  But otherwise, it was right on...and delicious too!

Ingredients:
12 (or so) graham crackers (the sheets)

1 1/2 sticks unsalted butter (3/4 cup)

1/2 cup brown sugar

1/8 tsp salt

1 1/2 cups semi-sweet chocolate chips

1 cup chopped nuts (I used pecans but almonds, walnuts, and probably even peanuts would be good)

Directions:
Pre-heat oven to 375.

Line a cookie sheet (15 x 10) with aluminum foil.

Line the bottom of the cookie sheet with graham crackers, breaking apart when needed.

In a small sauce pan, melt the butter.  Add the brown sugar.  Stir constantly (for about 5 months) until it thickens.

Add in the salt.

Pour over the graham crackers, spreading evenly.  Bake in the oven for about 10 minutes until mixture is bubbling.

Remove from the oven and evenly pour chocolate chips over the top.

Return to oven for 2-3 minutes (until chocolate chips are VERY soft).

Remove from oven and use a spatula or a frosting spreader to spread the melted/soft chocolate over the top of the brown sugar mixture.

Press chopped nuts into the top.

Let cool.  (I put it in the fridge overnight to help it set).

Remove foil from the back of the crackers and break into pieces.

Then enjoy!

Reba

Saturday, January 5, 2013

Peanut Butter Chocolate Chip Muffins


Today I was in the mood for muffins, but I wasn't sure what kind to make. I can always eat a good pumpkin muffin but I hadn't thought ahead to make cinnamon chips, so that was out.  I thought about some simple cinnamon muffins but I just made cinnamon bread earlier this week.  And we did not have enough bananas for a banana nut muffin.  What to do, what to do?  Well, I finally decided to make some that I had made a couple months ago. They were pretty well received, so why not try them again?  (For whatever reason, I never blogged about them)

Peanut Butter Chocolate Chip.

I have to say they were even more well-received this time (I think my boys missed out on them last time I made them).  I had to hurriedly pack one up to save for me to eat another day. I was afraid there would be nothing left but crumbs.

Even better, they are easy.  I almost always have these ingredients on hand.  And it took me about 15 minutes to prepare, then about 20 to bake.

And they are pretty filling.

The peanut butter/chocolate chip combo is very tasty but it is not overwhelming. As much as I like peanut butter/chocolate chip candy bars, I don't want a candy bar for breakfast.  Well, this is a much more subtle combination of the two flavors in a very filling form. 

The one thing it isn't:  low calorie.  That is why I ate one and hid another for another day. :)

Ingredients:
2 1/4 cups all purpose flour

2 tsp baking powder

1/2 tsp salt

2/3 cup brown sugar

6 Tbsp butter, melted (I used unsalted)

1/2 cup peanut butter

2 large eggs

1 cup milk

3/4 cup chocolate chips (I used real semi-sweet)

Directions:
Pre-heat the oven to 375 degrees.

Line muffin tin with paper liners.  We had regular size muffins, but I think next time I will make minis.

Whisk the flour, baking powder, salt, and brown sugar together in a bowl.

In a another (large) bowl, mix the butter, peanut butter, eggs, and milk.

Add the flour mixture to the butter mixture.

Stir until combined.   Add in the chocolate chips and stir a bit more.

Spoon (I used my cookie dough scoop because the dough is pretty thick) into the muffin tins, filling to the top.

Bake for about 20 minutes at 375.

Let sit for 5 minutes before eating.

Enjoy!

Reba


Wednesday, January 2, 2013

Seasoned Oyster Crackers

Recently a sweet parent from our school made some seasoned oyster crackers and put them in the teacher's lounge.  I made the mistake of trying a few.  And then a few more. And then a few more. Oh my goodness, they were (and are) addictive.

I think we got the recipe later and I also googled it but then when I was ready to make them, I couldn't find the recipe.  And then, light bulb...I looked in our family cookbook. And there it was.

I have to admit...this is way too easy to make.  And even easier to eat.

We are finishing up a batch from our family appetizer night earlier this week. I am so ready for it to be gone because it is such a HUGE temptation for me! I seriously cannot stop eating it.

So if you are in the mood for something a little salty, a little tasty, and not really that low calorie, this is the food for you. :)

Ingredients:
1 bag oyster crackers (12-16 oz)

1 envelope Ranch dressing mix (the dry powder...I actually use 1 Tbsp of a homemade version)

1/2-1 tsp dill weed (I used 1 tsp the first time and it was too much. This last time I didn't use any because of my first experience. I think next time I will go with 1/2 tsp to get it just right :)

1 tsp garlic powder

3/4 cup oil (I use olive oil because I LOVE olive oil...)

Directions:
Combine the oil, dressing mix, dill, and garlic. 

Spread the oyster crackers out into a large rimmed cookie sheet or a 9 x 13 baking dish. 

Pour the oil/seasonings over the oyster crackers. 

Bake in a 300 degree oven for 15-20 minutes.  Stir frequently. I actually have kept it in the oven for 25 or more minutes until most of the oil is baked into the crackers.

Store in an airtight container.

Enjoy.

I know.  Simple. But divine.

Reba


Tuesday, December 18, 2012

Cinnamon Swirl Bread

Another case of the picture NOT doing this food justice.  It is a travesty, I know.  I would love to be a professional food photographer OR have my own personal food photographer. But honestly usually when I cook things, we are rushing to get things on the table so we can eat.  And my pictures are taken in "drive by" style.  
 I am just thankful I got a picture of this before the kids got hold of it.  Because they love it.  And if I had waited, I might have had just crumbs left to snap photos of...
Yes, another Pinterest recipe. I saw it and thought, "Why not?"  It reminds me a lot of the coffeecake I make.  But a much simpler version for days that I need a much simpler recipe.

I have also decided that they make good gifts or products for a bake sale.

Best of all, you are encouraged to make these the night before, so it is ready and waiting. Just warm it up in the morning (re-heat) and enjoy.

Ingredients:
2 cups all-purpose flour (I have been using King Arthur's unbleached when I have a chance)
1 Tbsp baking powder
1/2 tsp salt
1 cup white sugar (granulated)
1 egg, beaten
1 cup milk
1/3 cup vegetable oil

Cinnamon swirl ingredients:
1/3 cup white sugar
2 tsp cinnamon

Directions:
Preheat oven to 350 degrees.

Grease a loaf pan (9 x 5 inch).

In a large bowl, combine the flour, baking powder, salt, and sugar.  Add in the egg, milk, and vegetable oil.

Stir just until moistened. Do NOT overstir.

Pour half the batter into the loaf pan.  I don't know if "pour" is an accurate word because it was more like "spoon" to me...not that runny.  But it worked.

Sprinkle with the cinnamon swirl ingredients.

Pour remaining batter over the top.

Sprinkle a little more cinnamon/sugar if you wish (like you could go wrong with more cinnamon and sugar :).

Bake in the oven for 45-50 minutes or until a toothpick comes out clean.

Let the pan cool for about 10 minutes.

Move to a wire rack to finish cooling completely.

I will admit, I totally skipped the wire rack. I just let mine keep cooling in the pan.

Wrap up with foil and save for the next day.  (It will be very crumbly to cut right after it comes out of the oven)  We microwave a slice or two for around 10 seconds the next day.

Enjoy!


Monday, September 3, 2012

Oreo Cupcakes


My daughter has a sweet tooth.  (The older one)  She LOVES sweets. Always has. One of my favorite pictures of her is from her toddler days. She is standing at the kitchen counter on a stool, her mouth covered in chocolate (from Hershey's kisses I think).

Just in the past year she has become a little baker.  Well, not so little anymore. She is 11. But she is always my little girl no matter how old she is. :)

At first it started with the Easy Bake Oven.  Then she moved on to cake mixes or brownie mixes. Now she is venturing out and trying out recipes.

Recently this daughter read a book from a series called The Cupcake Diaries.  She found a basic cupcake recipe and has created a couple of cupcakes using it.

This past weekend, I decided to take a nap. I had picked up a package of Oreos for her at her request. When I got up from my nap a couple hours later, I found the plates above.  Oreo cupcakes.

I posted a pic on FB and had requests for the recipe.

I am going to share the basic recipe with a couple additions.  However, since I haven't been with my daughter when she makes it, I cannot guarantee it is precisely what she does. I think she is a "try a little of this" kind of cook.  She has mentioned that sometimes she will add more sugar or vanilla than the recipe calls for.  So who knows what her final recipe actually includes.

Either way, it is good stuff!  Especially if you like Oreos. :)

Ingredients:
Cupcake batter

1/2 cup unsalted butter at room temperature
2/3 cup granulated sugar
3 large eggs at room temperature
1 tsp pure vanilla extract
1 1/2 cups all purpose flour
1 1/2 tsp baking powder
1/4 tsp salt
1/4 cup whole milk (except we NEVER have whole milk so she has to use what we have...1%)
Crushed Oreos (I have no exact measurements. I know she didn't use a whole package because we have a few left. And she saved a few for the frosting.  So maybe half a package?

Directions:
Preheat oven to 350 with the rack in the middle of the oven.

Line muffin tin with cupcake liners (12 cupcakes).

Beat the butter and sugar on medium speed until fluffy with electric mixer.

Add eggs one at a time.

Blend in the vanilla.

In a separate bowl, whisk together the flour, baking powder, and salt.

Add the flour mixture to the mixing bowl, beating at a low speed. Alternate with the milk.  Beat until the batter has no lumps.

Add in the crushed Oreos.  Beat until thoroughly mixed.

Evenly fill the muffin tins.  Bake for about 18-20 minutes.  Use a toothpick to check if they are done or not (if it comes out clean other than the Oreos :)

Remove from oven when done.  Place on a wire rack to cool.

Ingredients for Frosting:
1/2 cup unsalted butter at room temperature
4 cups powdered sugar (it is supposed to be sifted but I don't think she knows how to do that so I am guessing hers wasn't :)
1/3 cup whole milk (again, she used 1%)
1 tsp pure vanilla extract (she said she sometimes adds more vanilla and powdered sugar :)
crushed Oreos (just a few)

Directions:
Mix the butter until it looks fluffy (using an electric mixer).

Add in the sugar, alternating with the milk and vanilla until is it blended.

Add in the Oreos.  (Dear Daughter also said she might just sprinkle them on top next time because it is HARD to spread with the Oreos IN the frosting).

Frost.

Daughter just used a knife and a decorator pump to do this, though she really wants to practice piping.

A little mini Oreo on top in the middle would be really cute.

It is good stuff.

Enjoy!

Reba

Saturday, September 1, 2012

Personal Pan Pizza


I am always craving pizza.

Always.

We used to eat it about once a week.

Now it is rare for us to go out for any.

However, I usually make one at home or make a pizza grilled cheese.

And on a rare occasion, we order one from my favorite Chicago pizzeria. 

Tonight my big boys are the Razorback football game. I needed an easy dinner for us to all enjoy.

Of course, pizza came to mind. :)

My kids LOVE making their own pizzas. We do that on occasion.  But typically we use those little individual crusts from the store. However, those are a bit on the expensive side.

Recently on Pinterest someone suggested using Rhodes dinner rolls as little pizza crusts.

Bingo.

I keep those frozen dough balls in my freezer.

In fact, I like the Rhodes Texas dinner rolls. They are slightly bigger.

So this afternoon, I took a few out and let them thaw as I napped.  (It is Saturday after a long week of school...I needed to snooze)

Tonight, we all rolled out our roll flat.  Then we brushed on olive oil and added our toppings.  My kids mainly added sauce, cheese, and pepperoni.  I made mine like I do the big ones...White Cheese (light ricotta, Parmesan, mozzarella, and feta with a few sprinkles of Italian seasoning and basil).

After you have "decorated", bake for 10 minutes at 400 degrees.

My one piece of advice is to use little squares of parchment paper. Sprinkle or mist with olive oil and then let your child work with his/her dough on that. Then you can just drop it onto the cookie sheet to bake.  Our biggest issue was moving the pizza over to the cookie sheet without messing up their pizzas. :)

It was fun and a much easier (and cheaper) way to make pizza. I will say that even the Texas roll doesn't make a HUGE pizza. So if you have teens, you might let them make a few...

Happy cooking!
Reba


Thursday, February 9, 2012

Cowboy Stew

We finally made it through the rotation of kids (one a week helps me plan a meal to cook with me during that week). So this week we rotated back to child 1. When I asked him earlier this week what we should make, he said (without hesitation), "Cowboy stew".

I think my exact words were "Are you sure about that???"

In our school district, for several years now, the first graders have had a rodeo unit (I believe it started as an economic unit because of the annual rodeo our town hosts). As part of that unit, the kids make "cowboy stew" to try.

So I went to the first grade teachers and asked for the recipe.

Oh joy.

There is no set recipe. You just kind of throw beans, hot dogs, brown sugar, and barbecue sauce in a crockpot or a pot on the stove and cook.

Sounds easy enough but I actually do much better with an actual recipe. I may not follow it to a T but I at least know where we are headed.

I sure didn't with this one.

So we just made it up as we went along.

We ended up adding a can each of great northern beans, chili beans, kidney beans, and black eye peas in a large pot on the stove. We then added a bottle of Sweet Ray's barbecue sauce. And we decided to use Little Smokies (cut in thirds) instead of hot dogs.

I could NOT bring myself to add the brown sugar because I had already calculated the calories for this recipe without it and the calories were UNREAL. Barbecue sauce is FULL of calories.

Anyway, once it was boiling (set on high), I turned the stovetop down to a low/warm. We let it cook about two hours, stirring constantly.

I will be honest, it wasn't my favorite. I mean, it was like "pork and beans".

But it wasn't terrible either.

And it was very filing (which was good since I didn't eat much after seeing the calories for this thing).

And for a cold night, it was warm in the tummy.

Child 1 thinks it would have been that much better with brown sugar. :)

But it was fun anyway.

Reba

Thursday, January 26, 2012

Chicken Noodle Soup

So sorry to be missing in action. We have been having some "tried and true" recipes. That and I started dieting. :( Or at least watching my calories. So I haven't really had much to share though I think I am behind with some recipes.

But I do have one recipe to share for the week. Chicken Noodle Soup.
I think I mentioned that once a week, the "child of the week" gets to plan and help me cook a meal. So far every child has chosen "new" recipe.

This week was Child 3's week. She got a cookbook called Picture Me Cooking for Christmas. The book has recipes and a place to put a picture of your child cooking that food. So last week, in anticipation of cooking this week, Child 3 pulled out her cookbook and immediately found a recipe for Noodle Soup.

I try to be really careful with copyright material, but honestly, this is a pretty generic recipe, so I am going to share it.

Oh, we (or rather I) decided it would be chicken noodle soup, not just noodle soup.

By the way, this was a first for me. I had never made chicken noodle soup.

Ingredients:
6 chicken tenderloins

2 quarts chicken stock (I used fat free)

3 cups vegetable stock (which is REALLY hard to find around here and is a bit pricey)

1 tsp chicken bouillon (I just used a bouillon cube)

1/2 cup chopped carrot (I just chopped up some "baby" carrots)

celery (optional...we opted out :)

1 to 1 1/2 cups noodles of your choice. We just used a whole bag of some kind of egg noodle.

Directions:
Boil chicken tenderloins, then cut into small pieces/shred.

Put vegetable stock, chicken stock, bouillon, and vegetables in a large pot.

Bring to a boil.

Add noodles.

Cook for 10-15 minutes or until noodles are tender.

Add chicken and simmer until ready to eat.

Enjoy!

It was really good.

The only change I would make would be to get lower sodium stock. It was too salty for me.

This was a very kid friendly recipe. I chopped carrots but for the most part, dear daughter added everything to the pot.

Oh, we had grilled cheese rolls with it.

We will have it again. :)

Reba

Sunday, January 15, 2012

Fried Pork Bites

Just a reminder: I never claimed to be a food photographer.

Anyway, I decided that I wanted to spend more quality time with the kids. One on one. That is not easy in this house. One way I decided to make this effort was with food. After all, isn't food the universal language? Plus, as an added bonus, maybe my kids will pick up on some important cooking skills that will help them when they move out of the house one day. :)

I started last week with the firstborn (still need to share that recipe). This week was Child 2's turn. She had it all planned out last week I think. That is what she does. Poor Child 4. He doesn't think he will ever get his turn.

Sidenote: These are "guaranteed" cook with mom times. That doesn't mean we won't take advantage of the spontaneous moments, like when child 3 helped me make Pizza Snowballs the other day.

Anyway, Child 2 had this at school once for a family tree recipe activity. This recipe came from her friend whose mom R also happens to work at our school. It is a German recipe or at least comes from the German side of the family. It probably has a better name; I need to ask her. It wasn't on the recipe. So until then, I have made up my own. :)

Unfortunately, Child 2 poured so much of her energy into her dessert (she has a HUGE sweet tooth) that hubby and I ended up doing most of the work for this. But if she hadn't been busy baking, she would have been able to help with this. I would consider it kid-friendly. And it is easy and quick.

Enough of the chatter. Here is the recipe:
Fried Pork Bites

Ingredients:
1 lb pork tenderloin (we used a 2 lb pork tenderloin...I am wondering if the the breakfast thin pork tenders wouldn't work too; they would probably be cheaper)

1 sleeve crackers (I used Ritz. I doubled just to make sure we had enough but one would have been fine)

1 egg

1 tbsp parsley

1 tsp salt

1 tsp pepper

2 cups vegetable oil (I used my normal blend just to feel healthier :)

Directions:
Crush the crackers. We put them in a gallon size ziplock and pounded away :). Add the parsley, salt, and pepper. Set aside.

Cut the pork into bite size chunks (like nugget size). Pound with a meat tenderizer to flatten.

Dip the pork pieces into one beaten egg.

Add to the bag of cracker mix.

Shake away.

Use tongs to remove the pork from the cracker mix and add to oil in the skillet. (I would recommend heating the oil first so it is hot and ready to fry)

Cook about 2 1/2 minutes per side.

I think with our meat (2 lbs), it took about three batches to get it all cooked.

Enjoy.

I am beginning to see a pattern here. Out of the two times the kids have picked meals, they both have picked fried foods (which is very rare around here) and not exactly the cheapest meats. The first one chose catfish which costs a lot right now, and then the pork tenderloin was a bit more than we would spend on a typical meal. I think we may need to have a course on eating frugally AND healthy.

Oh, it was recommended to serve this with gravy. I didn't. I was already working on the cheesy hashbrown potatoes, Parmesan Pull-Aparts (bread), and black eye peas while helping my daughter with her dessert; I just couldn't add something else in. But hubby felt like it needed something like that. He ended up using ketchup to dip it. Oh, this tastes a lot like fried chicken even though it really is pork. :)

More later,
Reba

Monday, December 26, 2011

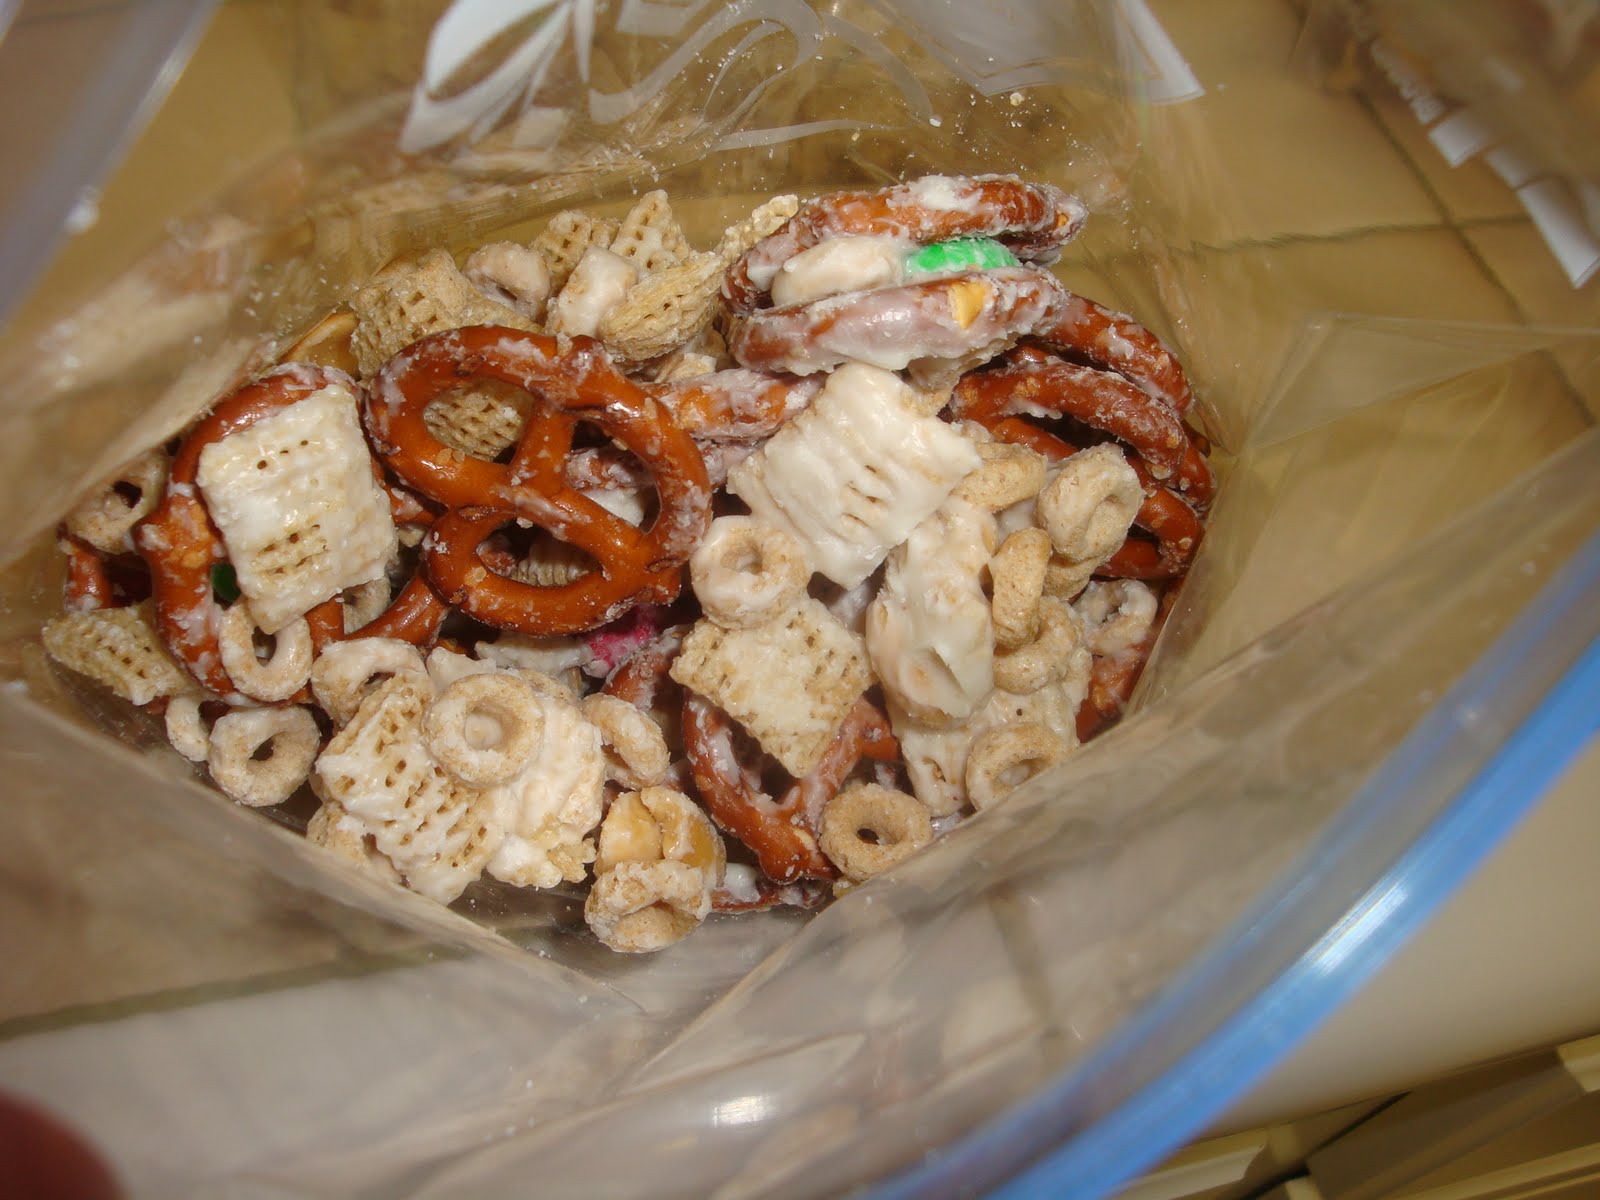
Christmas White Trash

Not long ago, my friend Katie (as in Katie Bread and Pumpkin Muffins) was talking about the gifts she had made for her son's teachers. He is in high school so he has many teachers. She said this was a perfect gift. Easy to make and it made a lot. Then I saw a similar recipe on Pinterest. Between the two, I was inspired. It is nothing new, but something I need to remember. It does make a lot. I had cookie sheets with wax paper all over my kitchen with this stuff on it. And though the name sounds funny, I can assure you that it tastes delicious. :)

Christmas White Trash

Ingredients:
Chex cereal
Cheerios
M and M's (I used the red/green)
mini pretzels
peanuts
almond bark (the white)

Directions:
Use a LARGE bowl.

Combine the Chex cereal, Cheerios, M and M's, pretzels, and peanuts in the bowl. Mix together.

Melt the almond bark. I only used one package but doing it again, I would use two since I used nearly a whole box of the cereals. :) I mean, I had two bowls full of goodies. I didn't feel like I had quite enough coating.

Melt the almond bark according to package directions. I melted mine in the microwave only because I was using the double boiler for dark chocolate.

Pour over the mixture.

Stir together with a large spatula.

Pour out onto wax paper on the countertop (I did mine on cookie sheets covered in wax paper just to contain it)

Let it cool/harden.

I then just scooped it up/broke it and put it into ziplock bags to go in bags with other goodies.

Easy. And delicious.

Reba

Friday, December 2, 2011

Pizza Snowballs


A couple weeks ago, my friend Megan mentioned making "Pizza Snowballs" with her girls for dinner. I sat there dazed and confused. I am on Pinterest and Facebook all of the time. How had I never heard of pizza snowballs? To add to my confusion, some of Megan's friends responded like they knew EXACTLY what she was talking about. Finally, I couldn't stand the unknown anymore. I put it out there. "What are those?" I asked. When she told me how easy and how good they were, I knew I wanted to try them.

So here I am a couple weeks later. And we aren't eating out. I am craving pizza. BAD. Really bad. I love pizza.

And it is Friday night.

We needed something simple. Something good. Something fun.

The pizza snowballs sounded like a good fit.

Unfortunately, Megan's explanation of them is lost in a sea of Facebook messages and updates. So I did what any red-blooded American would do. Googled it. :)

And I found this website.

It described exactly what my friend Megan had described. Perfect. :)

I also liked that it was "kid friendly". Child 3 has been on a "help in the kitchen" kick recently, so I thought this might be a fun activity. And it was. She was rather proud of her creation and reminded us several times at dinner that she was responsible for the yumminess. :)

So, if you have never heard of pizza snowballs (or maybe I was the only one), here is the recipe:

Ingredients:
2 (or more) cans of biscuits (I didn't realize the website above had used Grands; I just got the four pack of country style biscuits...not nearly as big but I was able to make 24 and still have dough left over for very cheap)

cheese (I shredded a small block of both Mozzarella and 2% sharp cheddar)

pepperoni chopped up (I also did a few with Canadian Bacon chopped up)

cooking spray (I actually used cupcake/muffin liners because our muffin tins are in rough shape...I would definitely do that again. EASY clean up!)

1 jar pizza sauce (we used it for dipping)

Directions:
Cut the biscuits into four pieces with kitchen scissors.

Take three or four pieces and add a heaping spoonful of the desired cheeses and/or meat. (I made one pan of pepperoni, and a half a pan of pepperoni and Canadian Bacon and a half a pan of just cheese with some Parmesan added)

What I did was give Child 3 a shallow bowl. I would add in all of the ingredients and have her work over it. At the same time, I did the same for myself so it wouldn't take quite so long.

Anyway, so you take these ingredients and squish all together just like Play-Dough. It was fun. You shape it into a "ball". Then drop it in the muffin pan (or in my case, muffin liner).

Bake at 350 for 15-17 minutes or until the snowballs are golden brown.

Serve warm.

As I said, we used pizza sauce for dipping. I love my ramekins...they are perfect for holding dipping sauces.

Enjoy.

Hubby said it was as good (actually better) than the little individual pizzas we make.

The nice part is that I don't think it was very high in calories and fat.

The biscuits I used were small, and three biscuits (which was basically three pizza snowballs for us) was only 2 grams of fat. You really only use a couple of spoons full of cheese. And I used turkey pepperoni.

Which means I have no guilt about how many I ate. :)

Oh, hubby is campaigning to change the name. He is voting for "Pizza Dippers" which I ironically have a different recipe for but these are MUCH better.

I will be making them again. Well, Child 3 and I will. :)

Enjoy!
Reba
PS I have several other recipes to share but this was fresh on my mind, so it came first...

Sunday, November 27, 2011

Cinnamon Crescent Rolls


On Thanksgiving morning, I wanted to have a special breakfast. I knew we wouldn't eat our Thanksgiving meal until dinnertime. I also thought the girls might want to help. So when I saw this recipe on Pinterest for cinnamon crescent rolls, I had no doubt this was the perfect way to start the day.

And it was.

The girls enjoyed helping me. They helped slather on the cinnamon goodness then roll up the rolls. And of course, they helped me eat them.

I basically followed the recipe on the site above and likely wouldn't change anything. They were just delicious. My favorite part was the cinnamon roll taste without being overly sweet. Like a hint of sweetness.

Ingredients:
2 cans crescent rolls (I did use the lower fat ones...figured if I could cut back on fat somewhere, I could eat more :)

1 stick butter softened (I did not set mine out early enough, so I softened it in the microwave...it is probably better to set it out ahead of time. Mine was pretty soft)

1/2 cup sugar

1 tbsp cinnamon

1/2 cup powdered sugar (for glaze)

1 tsp vanilla (for glaze)

2 tbsp milk (for glaze)

Directions:
Pre-heat oven to 350.

Beat butter, sugar, and cinnamon. I just had my daughter use a spoon to stir it thoroughly.

Unroll crescent roll triangles. (The original recipe said to use rectangles but I went with the triangles :) Spread a good spoonful of mixture onto the triangle and roll up like you normally would with a crescent roll.

Place rolls on an ungreased cookie sheet.

Bake for 10-15 minutes.

My rolls did get messy because some of the mixture leaked out. So I did move them to another pan, flipping them, about 10 minutes into the baking to make sure they didn't get soggy.

Meanwhile, mix the glaze.

When rolls are finished, drizzle glaze over them.

Enjoy.

We will be making these again.

Yum!

Reba

Friday, October 7, 2011

One Minute Peanut Butter/Chocolate Cake

This is another Pinterest recipe.

Last week, I tried another "microwave cake" recipe with the kids. It didn't work so well. It looked good but it was similar to eating a sponge.

So I was hesitant when I saw yet another microwave cake recipe.

Except the picture (the original one, not mine above) caught my eye. That and the whole peanut butter thing.

In fact, I couldn't get it out of my mind.

So that very night, I just had to try it myself.

And I liked it.

So this week, after dinner one night, I put all of the ingredients out on the table and I let the kids make their own.

The kids liked them too.

The original recipe can be found here.

Ingredients:
1 egg, beaten
1 tbsp brown sugar
1/2 tsp baking powder (NOT soda)
1 heaping tbsp flour
2 tbsp peanut butter (I use the "natural" kind)
2 tsp or so chocolate chips (I used the mini, semi-sweet chocolate)...this is optional :)
1 tsp milk
1 tbsp powdered sugar

Directions:
Mix together the egg, brown sugar, baking powder, flour, peanut butter, and chocolate chips.

Spoon/pour into a greased ramekin.

Put in the microwave for 30 seconds. (I have been putting it for closer to 50...I try to be cautious when it comes to eggs.)

Meanwhile, stir together the milk and powdered sugar.

When the cake is down, pour the "frosting" over the top and enjoy.

I have made the "frosting" both times and it is okay but I would eat the cake without it too...

It is a nice quick fix for a sweet craving, and if you like peanut butter and chocolate, this will do the trick!

Saturday, May 21, 2011

Chocolate Chip Muffins

Lauren was in a cooking mood this morning. She likes pumpkin muffins and always eats them but she gets tired of them I think. Plus she has a major sweet tooth. She has been wanting to make chocolate chip muffins for quite a while; she had some at my parents' house one time. Today I found the recipe (no easy task) and found almost all of the ingredients. The only one we didn't have...mini chocolate chips. We did have some mini semi-sweet chocolate chips and then some regular size semi-sweet chocolate chips. We decided to use those.

Technically, Lauren made these. I was just there to answer questions, help a little with the stirring, and double check her measurements. Very kid friendly recipe courtesy of my mom.

Here it is...

Chocolate Chip Muffins

Ingredients:
1 egg
1/2 cup milk
1/4 cup vegetable oil (I only had a canola oil blend...it worked fine)
1 1/2 cups flour
1/2 cup sugar
2 tsp baking powder
1/2 tsp salt
1 1/2 cup mini chocolate chips

Directions:
Heat oven to 400 degrees.

Place liners in 12 medium muffin cups. We decided to do mini muffins, so we did that instead.

Beat egg. Stir in milk and oil.

Mix in remaining ingredients except for the chocolate chips. Stir until the flour is moistened. The batter will be lumpy and fairly thick.

Stir in the chocolate chips.

Fill the muffin cups 2/3 cups full. In our case, we used my favorite cookie scooper tool and dropped the dough in the mini-cups, one "scoop" a cup.

Bake for 20 to 25 minutes or until gold brown.

Yum.

Maybe not the healthiest but I suppose there are a lot less healthy things I could make!

Reba


Tuesday, May 17, 2011

Chicken Crescent Pockets

It is not the fanciest meal in the world. Nor a BIG meal by any means. But it is easy to make, cheap to shop for, and all but one of my kids will eat it. So it is a good meal for when Dad is out of town. It feeds us all and doesn't take much time. :) Plus, I really like them. I could eat the whole pan...

This recipe came via our family cookbook (on my mom's side) from my cousin and his wife who live up north.

Are you ready? This really is easy.

Chicken Crescent Pockets (my children call them Hot Pockets)

Ingredients:
1 can chicken breast (found by the tuna which can also be used)
1 cup shredded cheddar cheese (I use the light)
2 Tbsp Ranch dressing (again, I use light)
1 can of crescent rolls (light again)

Directions:
Mix the chicken breast, cheddar cheese, and Ranch dressing in a bowl.

Unroll crescent rolls and pinch seams together to form rectangles rather than triangles. Cut each rectangle in half (there should be eight all together) to make squares. Drop a spoonful of the chicken mixture in the middle of each square. Pull the corners in, pinching any seams, to form a "pocket" with the chicken inside. Place on a baking sheet and poke the tops of the rolls.

Bake at 375 for 15 minutes.

Yes, that is it unless you want to add celery, onions, olives, etc. We just eat it as is.. Yum!

Reba